 how-to
Tankless Water Heater Installation: 2026 Step-by-Step
Table of Contents
- What You Need Before Starting a Tankless Water Heater Installation
- Step 1: Turn Off Power, Gas, and Water
- Step 2: Drain and Remove the Old Water Heater
- Step 3: Mount the New Tankless Unit
- Step 4: Connect Gas and Water Lines
- Step 5: Install Venting and Condensate Drain
- Tankless Water Heater Sizing Guide: Why BTU Capacity Matters
- Tankless Water Heater Installation Cost: Permits and Labor
- Frequently Asked Questions
Last Updated: September 8, 2026
What You Need Before Starting a Tankless Water Heater Installation
A tankless water heater installation is a project that rewards careful preparation. Unlike swapping a traditional tank unit, going tankless requires you to verify gas supply pressure, venting clearances, and electrical service before you ever turn a wrench. Many DIY attempts stall halfway because the homeowner skipped the planning phase.
Before you begin, confirm you have the right tools and materials on hand. You will need a pipe wrench, tubing cutter, adjustable wrenches, a drill with masonry bits for mounting, pipe dope or Teflon tape rated for gas lines, and a manometer if you plan to test gas pressure yourself. You will also need the specific venting pipe required by your unit's manufacturer, typically Category II or III stainless steel for condensing models.
Check your local building department about permit requirements. Most jurisdictions require a permit for gas and venting work, and many require a licensed professional to pull it (hud.gov). Skipping this step can void your warranty and create liability issues if anything goes wrong. A quick call saves you from a failed inspection later.
Step 1: Turn Off Power, Gas, and Water
Your first move is to isolate the unit completely. Locate your electrical panel and switch off the circuit breaker that feeds the water heater. If you have a gas unit, turn the gas shutoff valve on the supply line to the closed position. Finally, close the cold water shutoff valve above the heater.
Open a hot water faucet somewhere in the house to relieve pressure in the lines. This simple step prevents a spray of residual water when you disconnect the old unit. Leave the faucet open until you have the new unit connected and are ready to purge air from the lines.
Step 2: Drain and Remove the Old Water Heater
Connect a garden hose to the drain valve at the bottom of the old tank and run the other end to a floor drain or outside. Open the drain valve and let the tank empty completely. Depending on sediment buildup, this can take 15 to 30 minutes for a standard tank.
Once drained, disconnect the water lines and gas line. Use two wrenches to avoid twisting the pipes. Disconnect the vent pipe from the draft hood and remove the old unit from the room. Take this opportunity to inspect the area for water damage or corrosion that needs addressing before the new unit goes in.
A common mistake is skipping the thermal expansion tank check. If your home has a closed plumbing system with a backflow preventer, code requires an expansion tank to handle pressure changes. Your new tankless unit will not solve this issue, so address it now while the space is accessible.
Step 3: Mount the New Tankless Unit
Position the mounting bracket at the correct height and ensure it is level. Use a stud finder to locate solid framing, or use masonry anchors rated for the unit's weight. A tankless water heater is heavy, often 40 to 60 pounds, so the bracket must be secured properly.
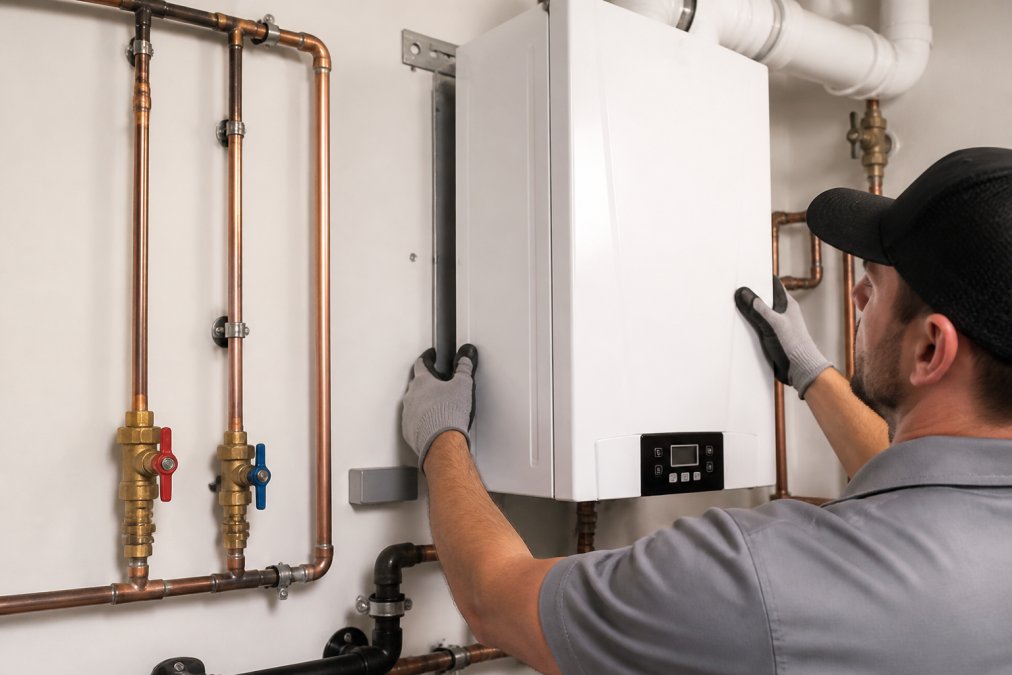
Hang the unit on the bracket and verify it sits flush against the wall. Leave adequate clearance around the unit for service access and for the manufacturer's required clearances for combustion air and venting. Most units need at least 12 inches of clearance on the sides and bottom for maintenance (energy.gov).
Step 4: Connect Gas and Water Lines
Run a new gas line from the shutoff valve to the unit using black iron pipe or approved flexible gas connectors. Apply pipe dope or Teflon tape to all threaded connections. Install a sediment trap, sometimes called a drip leg, before the gas control valve to catch debris. After connecting, test all joints with a gas leak detection solution or a manometer. Bubbles mean you have a leak, and you must fix it before proceeding.
For water connections, install shutoff valves on both the cold water inlet and hot water outlet. Use dielectric unions where copper piping meets the unit's fittings to prevent corrosion. Many installers prefer PEX tubing for the final connections because it is easier to work with and less prone to leaks.
Flush the lines before final connection to remove debris that could damage the unit's internal components. Open the cold water shutoff valve slowly and let water run through the unit and out the hot water side before you fully tighten the connections.
Step 5: Install Venting and Condensate Drain
Proper venting is non-negotiable for gas tankless units. Follow the manufacturer's instructions for vent pipe type, diameter, and maximum length. The vent termination must meet clearances from windows, doors, and air intakes as specified by code. Use the correct vent termination kit and seal all joints according to the manual.
Condensing units produce acidic condensate that must drain safely (the EPA). Connect the condensate drain line to a floor drain or use a condensate neutralizer kit if you are draining into a sink or laundry standpipe. Do not connect the condensate line to the unit's vent or to any other drain without checking local code.
Tankless Water Heater Sizing Guide: Why BTU Capacity Matters
The most common reason a tankless water heater installation fails is improper sizing. A tankless water heater sizing guide starts with your home's peak hot water demand, measured by flow rate in gallons per minute. Count every fixture that could run simultaneously, then add their flow rates together.
BTU capacity determines how much the unit can raise the incoming water temperature. The temperature rise is the difference between your incoming groundwater temperature and your desired output temperature. In colder regions, the incoming water is colder, so you need a higher BTU capacity to achieve the same output. A unit rated for 199,000 BTUs might handle 5 gallons per minute in a warm climate but only 3.5 gallons per minute where groundwater sits near 40 degrees.
| Demand Scenario | Typical Flow Rate | Recommended Capacity |
|---|---|---|
| Single bathroom home | 3-4 GPM | 140,000-160,000 BTU |
| Two bathrooms, one running | 5-6 GPM | 180,000-199,000 BTU |
| Whole-house, multiple fixtures | 7+ GPM | Consider two units or a high-output model |
Tankless Water Heater Installation Cost: Permits and Labor
The tankless water heater installation cost varies widely based on your home's existing setup. A straightforward swap where gas lines and venting are already adequate costs less than a retrofit that requires running a new gas line or upgrading your electrical panel. The unit itself is only part of the total expense.
Permits, venting materials, and potential gas line upgrades add to the bottom line. If your current setup needs significant modification, the labor cost increases accordingly. Many homeowners find that the energy savings over time offset the higher upfront cost, but you should get a detailed quote before committing. Contact Water Heater Express LLC for a professional assessment of your home's specific needs.
The key to keeping costs predictable is having a licensed technician evaluate your gas supply, venting path, and water quality first. A professional installation protects your warranty and ensures the unit operates at peak efficiency. Water Heater Express LLC offers certified technicians who handle everything from the initial assessment to final testing, with flexible payment options to spread the cost.
Frequently Asked Questions
Can I install a tankless water heater by myself?
DIY installation is possible for experienced homeowners, but it involves gas line connections, venting, and electrical work that require permits and code compliance. Mistakes can lead to gas leaks, carbon monoxide exposure, or water damage. Many manufacturers void warranties if a licensed professional does not perform the installation. Before starting, check local building codes, as most jurisdictions require an inspection. If you are not confident working with gas lines and high BTU appliances, hiring a certified technician is safer and often more economical in the long run.
What is the average cost of tankless water heater installation?
Tankless water heater installation cost varies widely based on the unit's BTU capacity, venting materials, and whether you are retrofitting an existing system or building new. Retrofits often require upgrading gas lines and installing new venting, which adds labor time. Permit fees also vary by locality. Get an itemized quote that includes the unit, labor, materials, and permit costs. Ask about removal of the old tank and any drywall repair needed. A professional can provide an accurate estimate after assessing your current setup.
Do I need a permit for tankless water heater installation?
Yes, most local building departments require a permit for tankless water heater installation because it involves gas, water, and venting connections. The permit process ensures the work meets code and passes an inspection, protecting your home and family. Installing without a permit can create safety hazards and may cause issues when selling your home or filing an insurance claim. Your installer should handle the permit application and schedule the inspection. Always confirm the permit is pulled before work begins and that the final inspection is completed.
How long does it take to install a tankless water heater?
A straightforward replacement in the same location typically takes 4 to 8 hours for a professional. Retrofitting an existing system takes longer, often a full day or more, because it may require upgrading the gas supply line, installing new venting, and adding a condensate drain. The time also depends on the complexity of the mounting surface and access to plumbing. A professional will assess these factors before starting. DIY installations usually take significantly longer, especially if you are learning the process as you go.
Tankless water heater installation rewards attention to detail and respect for local codes. Whether you are replacing a failed tank or upgrading for efficiency, the process demands careful sizing, proper gas and venting work, and thorough testing. When you need expert help, Water Heater Express LLC provides certified technicians, same-day service, and a price match guarantee. Book online today and get reliable hot water on demand.